Raspberry Pi/Installation
{{Note|Since the Raspberry Pi hardware and setup process has not changed much over the years, this article supports both the Rpi1 and the Rpi2. The Rpi3 is supported in 32-bit mode via the Rpi2 process.
For Rpi3 in 64-bit mode see Raspberry Pi 3 64 bit Install.
This document describes how to install Gentoo on the Raspberry Pi 1, 2, and 3 in 32-bit mode.
Hardware
Models
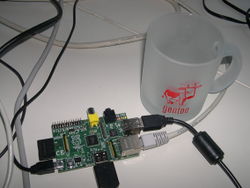
| The Raspberry Pi is series of single-board computers based on ARM devices. Raspberry Pi 1 is based on BCM2835 SoC and features a single core CPU (ARMv6), with 512 MB RAM. Earlier models had 256 MB RAM. |  Chí-Thanh Christopher Nguyễn (Chithanh) 's Raspberry Pi 1 running Gentoo |
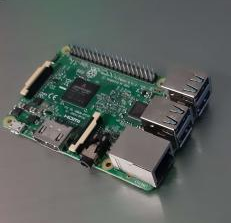
| Raspberry Pi 2 is based on BCM2836 SoC and features a quad-core CPU (ARMv7) and 1 GB RAM. The model 1 uses an SD card for storage but the model 2 uses a microSD. All versions have a VideoCore IV GPU. |  User:Vieta's Raspberry Pi 2 |
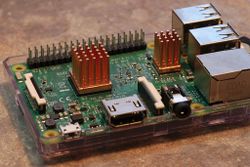
| Raspberry Pi 3 B is based on BCM2837 SoC. According to #gentoo-arm (webchat), although the ARMv8 CPU in the Raspberry Pi 3 B is 64-bit, almost everything else is 32-bit, and therefore only 32-bit kernels are supplied from upstream for the machine.[1] Those who want to build a 32-bit kernel for the Pi 3 B, follow the Raspberry Pi 2 options listed below. 64 bit kernels are covered in the Raspberry Pi 3 64 bit Install guide. |  Ilja Sara (Zucca) 's RaspberryPi 3 B with heatsinks |
| Raspberry Pi Zero is small size single-board computer using same ARM BCM2835 SoC as Raspberry Pi. Versions 1.3 and above have camera connector compatible with other Raspberry Pi cameras modules and W version has integrated WiFi module. It has 512 MB RAM and out-of-box possibility to run at 1 GHz. |
Installation
Partitioning
The SD card must be properly prepared before installing Gentoo. Before partitioning, check to see if the SD card is listed as compatible in this list.
Create at least two partitions on the SD card. The /boot partition should be FAT32. The root (/ partition can be any preferred Linux filesystem, however since SD cards are flash-based media, there are many benefits to using F2FS.
Disk /dev/sdb: 16.6 GB, 16574840832 bytes
255 heads, 63 sectors/track, 2015 cylinders, total 32372736 sectors
Units = sectors of 1 * 512 = 512 bytes
Sector size (logical/physical): 512 bytes / 512 bytes
I/O size (minimum/optimal): 512 bytes / 512 bytes
Disk identifier: 0x1db42224

   Device Boot      Start         End      Blocks   Id  System
/dev/sdb1   *        2048      835379      416666    c  W95 FAT32 (LBA)
/dev/sdb2          835380    31889024    15526822+  83  Linux
/dev/sdb3        31889025    32372735      241855+   5  Extended
/dev/sdb5        31889088    32372735      241824   82  Linux swap / Solaris
For optimal compatibility, 255H/63S geometry is recommended.
SD cards are very different from rotational devices. So it is non-trivial to achieve best I/O-performance. See example [1] to start understanding the difficulties. Also, be aware that there are a lot of contradicting advice regarding partitioning and suitable filesystems for SD cards.
Boot partition
The minimum setup for a correct /boot partition requires the following proprietary firmware files, provided by the Raspberry Pi foundation:
- bootcode.bin
- fixup.dat
- start.elf
- kernel image(s)
- DTB (Device Tree Blob) files
To boot the Raspberry Pi with gpu_mem=16 setting in config.txt, following files are required:
- fixup_cd.dat
- start_cd.elf
There are two video drivers for the Pi. The older one uses a fixed reserved GPU memory space. The Open Source VC4 driver uses the kernels contiguous memory allocator. Set gpu_mem=16 when using the vc4 driver to avoid wasting RAM.
The proprietary firmware files are just an emerge away:
root #emerge --ask sys-boot/raspberrypi-firmwareThe firmware files are installed in /boot. The boot partition of the SD card should be mounted on /boot before emerging the sys-boot/raspberrypi-firmware package.
Note that sys-boot/raspberrypi-firmware no longer installs /boot/*.dtb and /boot/overlays/* files after version 1.20190709 [2]. To get those, as well as a pre-compiled Raspberry Pi kernel and modules, by emerging the sys-kernel/raspberrypi-image package:
root #emerge --ask sys-kernel/raspberrypi-imageAlternatively, when using a custom kernel, skip the sys-kernel/raspberrypi-image package and emerge the live ebuild =sys-boot/raspberrypi-firmware-9999. This will install latest firmware directly from the repository of the Raspberry Pi foundation and will not install a kernel or modules.
The firmware ebuild created a file called cmdline.txt which specifies any necessary kernel parameters. Make sure to adjust the root partition, if necessary. For example change the root parameter to:
/mnt/raspberrypiroot/boot/cmdline.txtroot=/dev/mmcblk0p2 rootdelay=2
When the file /boot/config.txt does not exist, bootcode.bin defaults to sensible settings for most things
On a Pi 1 the kernel is expected to be called kernel.img
On a Pi 2 the kernel is expected to be called kernel7.img
On a Pi 3 if kernel8.img exists, the Pi is put into 64 bit mode and kernel8.img is booted.
else kernel7.img is booted.
Stage 3
Download appropriate Stage 3 file.
For Raspberry Pi A, A+, B, B+:
Depending if systemd or openrc is preferred, either substitute XXXX for openrc or systemd
root #wget http://distfiles.gentoo.org/releases/arm/autobuilds/current-stage3-armv6j_hardfp-XXXX/stage3-armv6j_hardfp-XXXX-YYYYMMDD.tar.xzFor the Raspberry Pi 2 or a Raspberry Pi 3 running in 32-bit mode:
Depending if Systemd or openrc is preferred either substitute XXXX for openrc or systemd
root #wget http://distfiles.gentoo.org/releases/arm/autobuilds/current-stage3-armv7a_hardfp-XXXX/stage3-armv7a_hardfp-XXXX-YYYYMMDD.tar.bz2Extract the root filesystem to SD card:
For the Raspberry Pi A, A+, B, B+:
root #tar xpf stage3-armv6j_hardfp-XXXX-YYYYMMDD.tar.xz -C /mnt/raspberrypiroot/For the Raspberry Pi 2 or Raspberry Pi 3 running in 32-bit mode:
root #tar xpf stage3-armv7a_hardfp-XXXX-YYYYMMDD.tar.xz -C /mnt/raspberrypiroot/
Adjust the make.conf file:
/mnt/raspberrypiroot/etc/portage/make.conf# Raspberry Pi A, A+, B, B+:
CFLAGS="-O2 -march=armv6j -mfpu=vfp -mfloat-abi=hard"
CXXFLAGS="${CFLAGS}"
# Raspberry Pi 2, or Raspberry Pi 3 running in 32 bit mode:
CFLAGS="-O2 -march=armv7-a -mfpu=neon-vfpv4 -mfloat-abi=hard"
CXXFLAGS="${CFLAGS}"
Do not forget to adjust the /etc/fstab file. The SD card is recognized as /dev/mmcblk0.
Generate the root password hash:
root #openssl passwd -1Add the hash to the /etc/shadow file.
Stage 4
NOOBS image. The NOOBS image will be created on a daily basis. I'd be pleased to get feedback... NOOBS images can be downloaded from here: https://github.com/raspberrypi/noobs, then untar the NOOBS image from above in the OS directory (/os/Gentoo).
The NOOBS Image is no longer in support. Please use the official rpi-imager from Raspberry Pi instead.
Portage tree
Download the latest Portage tree:
root #wget http://distfiles.gentoo.org/snapshots/portage-latest.tar.bz2Ensure there are enough inode blocks free on the root partition. Portage takes up approximately 181K inodes.
root #df -ih | grep -E 'Mounted|mmc'Extract Portage to the SD card:
root #tar xjvpf portage-latest.tar.bz2 -C /mnt/raspberrypiroot/usrCross compiling
To aid the Raspberry Pi's low power processor and hasten the Gentoo installation process, adding another machine to help the Rpi with compile jobs is preferred. Gentoo developers have created a cross compiling tool called crossdev in order to assist with toolchain generation. Once the toolchain is generated on a stronger machine, the stronger machine can help with compilation tasks, which saves much time.
Crossdev
Install the sys-devel/crossdev wrapper scripts:
root #emerge --ask sys-devel/crossdevCreate the cross toolchain for ARM, specifying the correct CPU architecture for the device as follows.
The
-S option can be omitted for those who wish to run an unstable or absolute bleeding-edge latest system.For the Raspberry Pi A, A+, B, B+:
root #crossdev -S -t armv6j-unknown-linux-gnueabihfFor the Raspberry Pi 2 or Raspberry Pi 3 B in 32-bit mode (recommended):
root #crossdev -S -t armv7a-unknown-linux-gnueabihfFor the Raspberry Pi 3 B in 64-bit mode:
root #crossdev -S -t aarch64-unknown-linux-gnu --genv 'USE="cxx multilib fortran -mudflap nls openmp -sanitize"'root #cd /usr/aarch64-unknown-linux-gnu/etc/portage && rm make.profile && ln -s /usr/portage/profiles/default/linux/arm64/13.0/desktop make.profile
This will ensure a compile even if the host system is hardened, ie. defaults to sanitize (which does not yet work on arm64 architecture). A multilib profile may need toggled.
If there are any errors or Portage warnings here, please fix them. It will take a while for the cross toolchain to be successfully built. Go grab a coffee!
Compiling using chroot
It is possible to use generic x86_64 or i386 PC to chroot into existing SD card with Raspberry Pi system. This approach is significantly faster than compilation on Raspberry Pi (in case of using modern 4 core CPUs it gives about half of 'native' performance) and is slower (but easier) than using cross compiling approach.
To do so static installation of app-emulation/qemu is needed:
root #echo app-emulation/qemu static-user qemu_user_targets_aarch64 qemu_user_targets_arm >> /etc/portage/package.use/qemu
root #emerge qemu
root #quickpkg qemuAfter emerging QEMU with `static-user` USE flag, the qemu-arm executable needs to be copied into chrooting system:
root #cd /mnt/rpi
root #ROOT=$PWD/ emerge --usepkgonly --oneshot --nodeps qemuOnce done it is necessary to register ARM executable interpreter in running kernel:
root #echo ':arm:M::\x7fELF\x01\x01\x01\x00\x00\x00\x00\x00\x00\x00\x00\x00\x02\x00\x28\x00:\xff\xff\xff\xff\xff\xff\xff\x00\xff\xff\xff\xff\xff\xff\xff\xff\xfe\xff\xff\xff:/usr/bin/qemu-arm:' > /proc/sys/fs/binfmt_misc/register
root #echo ':aarch64:M::\x7fELF\x02\x01\x01\x00\x00\x00\x00\x00\x00\x00\x00\x00\x03\x00\xb7\x00:\xff\xff\xff\xff\xff\xff\xff\x00\xff\xff\xff\xff\xff\xff\xff\xff\xfe\xff\xff\xff:/usr/bin/qemu-aarch64:' > /proc/sys/fs/binfmt_misc/registerBefore chrooting add necessary mounts to slave system:
root #mount /dev/mmcblk0p1 /mnt/rpi/boot
root #mount -o bind /dev /mnt/rpi/dev
root #mount -o bind /proc /mnt/rpi/proc
root #mount -o bind /sys /mnt/rpi/sys
root #mount -o rw,nosuid,noexec,relatime,gid=5,mode=620,ptmxmode=000 devpts /mnt/rpi/dev/pts -t devpts
It also wouldn't be a bad idea to make sure /etc/resolv.conf is updated so network access works properly:
root #cp /etc/resolv.conf /mnt/rpi/etc/Finally chroot into Raspberry Pi system:
root #chroot /mnt/rpiKernel and modules
Download kernel sources for Raspberry Pi from GitHub:
root #emerge --ask sys-kernel/raspberrypi-sourcesAlternatively, to get the 'bleeding edge' Raspberry Pi kernel sources:
root #git clone --depth 1 https://github.com/raspberrypi/linux.gitManual compilation
Configure and install kernel manually:
For the Raspberry Pi A, A+, B, B+:
root #make ARCH=arm bcmrpi_defconfig
root #make ARCH=arm CROSS_COMPILE=armv6j-unknown-linux-gnueabihf- oldconfig
root #make ARCH=arm CROSS_COMPILE=armv6j-unknown-linux-gnueabihf- -j$(nproc)
root #make ARCH=arm CROSS_COMPILE=armv6j-unknown-linux-gnueabihf- modules_install INSTALL_MOD_PATH=/mnt/raspberrypiroot/
For the Raspberry Pi 2 or Raspberry Pi 3 B in 32-bit mode (recommended):
root #make ARCH=arm bcm2709_defconfig
root #make ARCH=arm CROSS_COMPILE=armv7a-unknown-linux-gnueabihf- oldconfig
root #make ARCH=arm CROSS_COMPILE=armv7a-unknown-linux-gnueabihf- -j$(nproc)
root #make ARCH=arm CROSS_COMPILE=armv7a-unknown-linux-gnueabihf- modules_install INSTALL_MOD_PATH=/mnt/raspberrypiroot/
Alternatively, use the following command to configure the kernel manually:
root #make ARCH=arm menuconfigGenkernel
genkernel can be used to cross-compile the kernel for Raspberry Pi. With genkernel all the preferences can be saved in genkernel.conf file for later use. The values of these variables need to be changed in /etc/genkernel-rpi.conf:
/etc/genkernel-rpi.conf# install kernel manually
INSTALL="no"
# Set arch to arm
ARCH_OVERRIDE="arm"
# No need to mount BOOTDIR and make symlink as the kernel is
# installed manually
MOUNTBOOT="no"
SYMLINK="no"
# Adjust this as needed for the machine.
MAKEOPTS="-j3"
# For Raspberry Pi A, A+, B, B+
UTILS_CROSS_COMPILE="armv6j-unknown-linux-gnueabihf-"
KERNEL_CROSS_COMPILE="armv6j-unknown-linux-gnueabihf-"
KERNEL_CC="armv6j-unknown-linux-gnueabihf-gcc"
KERNEL_AS="armv6j-unknown-linux-gnueabihf-as"
KERNEL_LD="armv6j-unknown-linux-gnueabihf-ld"
# For Raspberry Pi 2, or Raspberry Pi 3 B in 32-bit mode
UTILS_CROSS_COMPILE="armv7a-unknown-linux-gnueabihf-"
KERNEL_CROSS_COMPILE="armv7a-unknown-linux-gnueabihf-"
KERNEL_CC="armv7a-unknown-linux-gnueabihf-gcc"
KERNEL_AS="armv7a-unknown-linux-gnueabihf-as"
KERNEL_LD="armv7a-unknown-linux-gnueabihf-ld"
# Change this to the path of raspberrypi linux kernel sources.
# It is possible to make this a symlink pointing to the
# /usr/src/linux-rpi like it's done with a normal kernel.
# For example: ln -s /usr/src/linux-3.6.11-raspberrypi /usr/src/linux-rpi
DEFAULT_KERNEL_SOURCE="/usr/src/linux-rpi"
# Point this variable to the directory where the SD card is mounted.
# Note that the location needs to be mounted manually before running genkernel.
INSTALL_MOD_PATH="/mnt/raspberrypiroot"
# Genkernel needs access so /usr/share/genkernel (This folder contains default
# environment variables, scripts and source tarballs that enable genkernel to
# work).
GK_SHARE="${GK_SHARE:-/usr/share/genkernel}"
DISTDIR="${GK_SHARE}/distfiles"
# Genkernel also needs to have a logfile to write to. Without this present,
# you'll see "ambiguous redirect" printed out many times between legitimate
# messages.
LOGFILE="/var/log/genkernel.log"
After saving the configuration file (for example to /etc/genkernel-rpi.conf), mount the RaspberryPi SD card to the INSTALL_MOD_PATH configured above. Assuming the Raspberry Pi root partition device is /dev/sdd3, run:
root #mount /dev/sdd3 /mnt/raspberrypirootNow execute genkernel. For the Raspberry Pi A, A+, B, B+:
root #ARCH=arm genkernel --config=/etc/genkernel-rpi.conf --kernel-config=/usr/src/linux-rpi/arch/arm/configs/bcmrpi_defconfig kernelFor the Raspberry Pi 2 or Raspberry Pi 3 B in 32-bit mode (recommended):
root #ARCH=arm genkernel --config=/etc/genkernel-rpi2.conf --kernel-config=/usr/src/linux-rpi/arch/arm/configs/bcm2709_defconfig kernelSave the above command to the custom script:
/usr/local/bin/genkernel-rpi.sh#!/bin/sh
ARCH=arm genkernel --config=/etc/genkernel-rpi2.conf --kernel-config=/usr/src/linux-rpi/arch/arm/configs/bcm2709_defconfig kernel
root #chmod +x /usr/local/bin/genkernel-rpi.shNow simply create kernel for the Raspberry Pi by executing:
root #genkernel-rpi.shInstalling kernel image
For Raspberry Pi A, B, B+ (not 2 B!) create a kernel.img file by:
root #cp arch/arm/boot/Image /mnt/raspberrypiroot/boot/kernel.imgIf your Raspberry Pi does not boot with this kernel, you may have an older firmware, which requires kernel to be uncompressed. If so, you will need to:
root #emerge --ask sys-boot/raspberrypi-mkimageroot #imagetool-uncompressed.py arch/arm/boot/Image /mnt/raspberrypiroot/boot/kernel.imgor using the Raspberry Pi mkimage tool from GitHub:
root #chmod a+x imagetool-uncompressed.py
root #./imagetool-uncompressed.py arch/arm/boot/Image
root #cp kernel.img /mnt/raspberrypiroot/boot/
Alternatively, some devices need the zImage to be processed using the mkknlimg script. To do this:
root #scripts/mkknlimg arch/arm/boot/zImage /mnt/raspberrypiroot/boot/kernel.imgFor Raspberry Pi 2 B just copy arch/arm/boot/zImage to /boot/kernel7.img:
root #cp arch/arm/boot/zImage /mnt/raspberrypiroot/boot/kernel7.imgCopy the updated device tree binaries (.dtb) and device tree overlay (.dto) files into the boot partition:
root #cp arch/arm/boot/dts/*.dtb /mnt/raspberrypiroot/boot/
root #cp arch/arm/boot/dts/overlays/* /mnt/raspberrypiroot/boot/overlays/
The device tree files describe the hardware to the kernel. They are a part of the kernel on all arm systems
Copying the dtb files was necessary for me to get the official Raspberry Pi 7" touchscreen (input device) working.
RPi3 specific
Wi-Fi
RPi 3 and Zero W builtin Wi-Fi driver brcmfmac requires binary firmware blobs brcmfmac434*-sdio.bin and their corresponding configuration brcmfmac434*-sdio.txt to work properly. These are provided by the sys-kernel/linux-firmware ebuild.
Just install the package with
root #emerge sys-kernel/linux-firmware
It is also possible to downstrip the provided firmware files with the savedconfig useflag.
Bluetooth
The Raspberry Pi 3B/Zero W needs the BCM43430A1.hcd firmware file, and the Raspberry Pi 3B+ needs the BCM4345C0.hcd firmware file. The firmware files can be found in the Raspbian bluez-firmware GitHub repository. The firmware files need to be placed in the /lib/firmware/brcm directory.
Create the firmware directory:
root #mkdir -p /lib/firmware/brcmFetch the Raspberry Pi 3B, Zero W Bluetooth firmware:
root #wget -P /lib/firmware/brcm https://raw.githubusercontent.com/RPi-Distro/bluez-firmware/master/broadcom/BCM43430A1.hcdFetch the Raspberry Pi 3B+ Bluetooth firmware:
root #wget -P /lib/firmware/brcm https://raw.githubusercontent.com/RPi-Distro/bluez-firmware/master/broadcom/BCM4345C0.hcdWith an update to the firmware a new device tree overlay was introduced that enables autoprobing of Bluetooth driver without need of hciattach/btattach.
/boot/config.txtdtparam=krnbt=on
Attach the serial device /dev/ttyAMA0 to the Bluetooth stack using btattach, which is provided by the net-wireless/bluez package:
root #btattach -B /dev/ttyAMA0 -P bcm -S 921600 -NAlternatively, hciattach can be used if net-wireless/bluez is built with the deprecated USE flag enabled:
root #hciattach /dev/ttyAMA0 bcm43xx 921600 noflow -On the RPi3B+, hardware flow control should be enabled, so use instead (e.g.):
root #hciattach /dev/ttyAMA0 bcm43xx 3000000 flow - <bdaddr>The hciattach command may need to be repeated if it fails. There is patched version in the Arch Linux AUR repository available, which may work more reliably.
Both commands will create a HCI device (e.g. hci0) in /sys/class/bluetooth and load the required firmware.
Serial
Serial port on RPi3 has some issues related to variable clock rate[2][3]. A few workarounds/solutions are available.
VideoCore4
To enable VideoCore4 GPU acceleration on RPi device add following to /boot/config.txt:
/boot/config.txtdtoverlay=vc4-kms-v3d,cma-128
Also you need live raspberrypi-firmware-9999 ebuild to be installed (as others seems to be outdated and not compatible with latest kernels).
Finaly, add VideoCore4 configuration to mesa and rebuild it.
/etc/portage/package.use/00video*/* VIDEO_CARDS: -* vc4
For more info refer to Raspberry Pi VideoCore4 page.
Tips and tricks
- Storage is rather slow, even with the couple of compatible SDHC class 10 cards. If emerge will be running on the Raspberry Pi, putting /usr/portage on squashfs will speed up things dramatically.
- There is no hardware RTC on the Raspberry Pi. Use the ntp-client service to set the correct system time on boot. A fallback incremental clock can be archived by the swclock service (replaces the hwclock service).
- If more RAM is required for Linux, set the option
gpu_memin config.txt. The smallest amount that can be set is 16 MB, default is 64 MB [4] - More recent, unofficial kernel releases for the Raspberry Pi might be found at Chris Boot's repository: [5]
- Be sure to test the performance - if the numbers don't match up (for instance in the LINPACK benchmark), something is very wrong.
- For instructions on how to build binary packages for the Raspberry Pi on an Android phone see this blog post: [6]
- If it is not possible to create a working ARM cross-toolchain, a precompiled kernel image is available from the firmware repository. The boot/kernel.img needs to be places in the boot partition and the contents of the modules directory copied to /lib/modules/ on the SD card.
- Put the root-fs on a NFS share and put only the kernel image on SD card (PXE boot client).
Troubleshooting
- Problem: dmesg is full of
smsc95xx 1-1.1:1.0: eth0: kevent 2 may have been droppedand/or page allocation failure messages:- Solution: Try to update all firmware files in /boot, especially fixup.dat.
- Solution: If the former fails, add
smsc95xx.turbo_mode=Nto kernel parameters, orvm.min_free_kbytes=4096to /etc/sysctl.conf
- Problem: The following error shows up when running the command:
root #crossdev -S -t armv6j-unknown-linux-gnueabihf(...) configure: error: cannot compute suffix of object files: cannot compile (...)
- Solution: Try the following command instead[3]:
root #CFLAGS="-O2 -pipe -march=armv6j -mfpu=vfp -mfloat-abi=hard" crossdev --stage3 -S -t armv6j-unknown-linux-gnueabihf
- Solution: Try the following command instead[3]:
- Problem: On-board audio is inaccessible / non-functional.
- Solution: Ensure that your /boot/config.txt contains the line
dtparam=audio=on, then reboot. Ensure that the PCM channel is unmuted.
- Solution: Ensure that your /boot/config.txt contains the line
See also
- Raspberry Pi/Quick Install Guide
- Raspberry Pi/Kernel Compilation
- Raspberry Pi/Mainline Kernel
- Raspberry Pi/Cross building — offload much of the heavy lifting for compilation to a more powerful build system
- Embedded Handbook — a collection of community maintained documents providing a consolidation of embedded and SoC knowledge for Gentoo.
- Raspberry Pi/Minimal_musl%2Bbusybox_cross_building - Build a minimal system using libressl, musl libc, and busybox.
- Raspberry Pi VC4 - Enable GPU acceleration with the VC4 driver
External resources
- Raspberry Pi Hub at eLinux wiki, with more advanced tutorials to get the most out of the Raspberry Pi
- grbd@github: Putting Gentoo onto a RPI2 How-To install Gentoo Linux from Raspbian/NOOBS in an external USB disk in a Raspberry Pi 2.
- genBerry Sort of Gentoo stage 4 for RaspberryPi with several tools.
- gentoobs Gentoo on NOOBS.
- gentoo-on-rpi3-64bit Bootable 64-bit Gentoo image for RPi3.
- gentoo-pi maintained base headless Gentoo image, with distcc and sshd enabled.
Books
- Heitz, Ryan. Hello! Raspberry Pi. Manning Publications (2015). pp. 225. ISBN 9781617292453
