User:Sakaki/Sakaki's EFI Install Guide/Setting up the GNOME 3 Desktop
In this section, we'll be setting up GNOME 3 on your machine, using the modern Wayland platform (including XWayland support for legacy X11 applications).
GNOME 3 is a feature-rich desktop environment provided by the GNOME Project. It is one of the most widely-used Linux desktops. Version 3 has now been stabilized on Gentoo, and the older version 2 is no longer supported (reflecting an upstream decision).
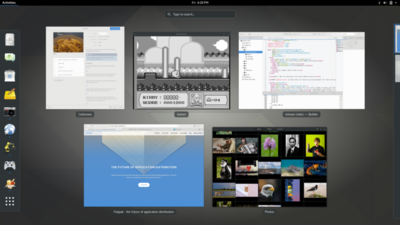
GNOME's user interface is known as the "GNOME Shell". It provides core user functions,[1] such as:
- launching applications,
- switching windows and desktops,
- searching for programs and files,
- notification management, etc.
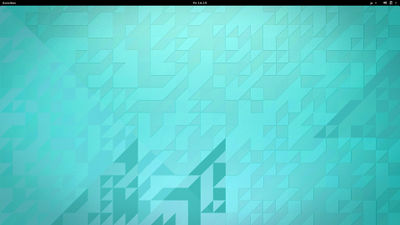
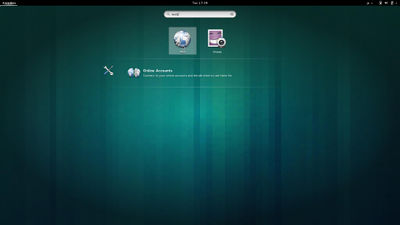
and uses accelerated, modern-looking graphics:
For more information about GNOME, see its official site and Wikipedia page. A list of GNOME releases may be found here.
GNOME requires graphical support scaffolding on which to run, and in previous versions of this guide, the X Window System ("X11") fulfilled this role. Now, however, as the more modern, lightweight and secure Wayland protocol has reached sufficient maturity for everyday use, we'll be leveraging that instead (with GNOME providing its own compositing window manager, mutter). As Kristian Høgsberg (one of the Wayland founders) writes in the project's FAQ:[2]
- What’s different now is that a lot of infrastructure has moved from the X server into the kernel (memory management, command scheduling, mode setting) or libraries (cairo, pixman, freetype, fontconfig, pango, etc.), and there is very little left that has to happen in a central server process. ... [An X server has] a tremendous amount of functionality that you must support to claim to speak the X protocol, yet nobody will ever use this. ... With Wayland we can move the X server and all its legacy technology to an optional code path.
Don't worry though — as we'll configure it here, you'll still have the option to log in to an old-school GNOME-on-X11 session if and when you want. Furthermore, even when using a GNOME-on-Wayland session, applications that don't support Wayland natively will be handled using an integrated, rootless X11 server (under the so-called XWayland approach).
Performance notwithstanding, probably the strongest end-user reason to transition to a Wayland-based desktop is security: unlike X11, by default Wayland enforces application isolation at the GUI level. You can read more about X11's vulnerability in this regard (and how to mitigate it, for legacy apps), in the additional mini-guide, here.
Accordingly, the process we'll be following in this section is:
- Adding a regular (non-root) user;
- Enabling the wayland USE flag globally;
- Updating your system to reflect this, then installing an X11 server for legacy support, and baseline testing;
- Temporarily installing a simple X11 window manager, and a few applications, also for test purposes;
- Reconfiguring the kernel to include an appropriate DRM graphics driver, recompiling using buildkernel, and rebooting;
- Verifying, upon restart, that the new DRM driver (which wayland requires) has been activated;
- Testing a simple X11 setup using twm;
- Installing GNOME 3 and key applications, and testing under X11; then
- Testing GNOME 3 on wayland, and refining settings.
This section has no direct equivalent in the Gentoo Handbook (although the part about adding a user reflects the "User Administration" section from Chapter 11, and the kernel DRM driver part has elements of the "Default: Manual (Kernel) Configuration" section from Chapter 7).
You may find the articles "GNOME Configuration HOWTO" and "systemd/Installing Gnome3 from scratch" (both from the Gentoo wiki) useful background reading.
The transition from GNOME 2 to 3 has caused some controversy in the Linux community, as it involves a significant shift away from the more 'traditional' desktop metaphor (see this Wikipedia article for example). And, until the advent of Dantrell B.'s patchset (and subsequent formal elogind support in the main Gentoo tree), forced you to use systemd...
If the newer look is not for you, don't despair. Although GNOME 2 is no longer supported in Gentoo, other similar desktops are; for example:
- LXDE (via package lxde-base/lxde-meta),
- XFCE (via package xfce-base/xfce-meta) etc.
Right, let's get started!
This chapter is only for those users who decided earlier to target systemd init, rather than OpenRC. It is part of the 'alternative track' set of chapters. If you are here by mistake, click here to go to the default (OpenRC) version of this page.
Adding a User for Daily Use
Per the Gentoo Handbook, it is strongly recommended to set up a user for day-to-day use on your machine. Let's do that now. Issue (via the ssh connection from the helper PC):
koneko ~ #useradd --create-home --groups users,wheel,portage,lpadmin,lp --shell /bin/bash --comment "sakaki" sakaki
koneko ~ #passwd sakaki
New password: <enter your new password>
Retype new password: <enter your new password again>
passwd: password updated successfully
Obviously, substitute your real name (for
"sakaki") and desired username (for sakaki) in the above commands. You can also define multiple users at this point if you like.Be sure to write this password down somewhere safe! You will require it to log in later.
Feel free to add or remove groups as required in the useradd command - the above set is a reasonable starting point for a 'power user' under systemd in Gentoo. See the description below for further information.
The meaning of those useradd options is as follows:
| Parameter | Short Form | Meaning | ||||||||||||
|---|---|---|---|---|---|---|---|---|---|---|---|---|---|---|
| --create-home | -m | Create the user's home directory if it does not already exist. | ||||||||||||
| --groups | -G | Specify a set of supplementary groups for the user. By default on Gentoo, when a user is created, a new group of the same name will also be created, and become that user's primary group. The additional groups specified here have the following function:[3][4][5]
| ||||||||||||
| --shell | -s | Specify the user's login shell. We've used bash here, as it is the default shell in Gentoo Linux. | ||||||||||||
| --comment | -c | A short description of the login; most commonly the user's full name (such as "John Doe"). |
With the move to systemd, many of the old hardware-access groups (such as disk, network, audio etc.) are no longer necessary, and may even cause problems if you add yourself to them. Other 'traditional' groups such as adm have no effect on modern systems.[7]
There are a number of other software groups that you may wish to add your user(s) to over time, as and when you emerge the specific packages. For example, if you use VirtualBox, you'd need to add your user to the vboxusers group; if running this install as a VirtualBox guest, you'd need to add your user to the vboxguest group. This wiki entry has a useful list of this type of group (and instructions for how to add and remove users from a group).
Enabling Wayland
Next, we'll activate the wayland USE flag globally on your system (we'll rebuild any existing installed packages affected by this change in the subsequent section). Issue:
koneko ~ #nano -w /etc/portage/make.conf
and append the following lines to that file:
/etc/portage/make.confAppend the following lines, to enable wayland# Globally enable Wayland.
USE="${USE} wayland"
Leave the rest of the file as-is. Save, and exit nano.
Installing X11
Next, we'll install an X11[8] server.
Although we'll using wayland as our primary graphical platform for GNOME, we need to ensure X11 is working too, because:
- apps not yet ported to use wayland will be hosted in a shared, rootless X11 server (the so-called 'XWayland' approach), and;
- we also want to allow the use of 'old-school' X11-based GNOME sessions as a fallback.
We need to set two additional USE flags for media-libs/mesa (an OpenGL-like library which X pulls in as a dependency), and while we're at it, set a few others that we'll need shortly for GNOME, so issue:
koneko ~ #echo -e "# required by standard X-server installation\nmedia-libs/mesa xa" >> /etc/portage/package.use/mesa
Here's what those flags do:
| Package | Use flag | Description |
|---|---|---|
| media-libs/mesa | xa | This enables the XA (X Acceleration) API for Gallium3D (a device driver framework for 3D graphics chipsets) (you may also find this Linux from Scratch page useful). |
As before, since some of the next steps will involve lengthy emerges, we'll use screen, and setup a second virtual console, which will be let us monitor progress using showem. Issue:
koneko ~ #screen
koneko ~ #export PS1="(1) $PS1"
to start screen. Then, press Ctrla then c to start a new virtual console, and in that new console enter:
koneko ~ #export PS1="(2) $PS1"
Now hit Ctrla then p to get back to the original console.
Next, update your existing package set to reflect the changed USE flags. Issue:
(1) koneko ~ #emerge --ask --verbose --deep --with-bdeps=y --changed-use --update @world
... additional output suppressed ...
Would you like to merge these packages? [Yes/No] <press y, then press Enter>
... additional output suppressed ...
See these earlier notes for an explanation of the options used in the above command.
Just as before, you can temporarily switch to the second console to watch the progress with showem, if you like. Use Ctrla then n to switch to the second console, and Ctrla then p to return back when done.
Wait for the update to complete, before continuing. It should not take too long on a modern machine (as we do not have many GUI-specific libraries or apps installed, yet). A few additional wayland-specific libraries will also be pulled in.
Now, since you have already set up the necessary VIDEO_CARDS and INPUT_DEVICES variables in /etc/portage/make.conf earlier, we can now proceed to install the X-server itself. Issue:
(1) koneko ~ #emerge --ask --verbose --oneshot x11-base/xorg-server
... additional output suppressed ...
Would you like to merge these packages? [Yes/No] <press y, then press Enter>
... additional output suppressed ...
and the X11 server will be downloaded, compiled and installed. Note that we use --oneshot here to avoid adding it to your @world set (this is slightly cleaner, as it will become a dependency of GNOME, once it is installed later).
If you are installing onto a VirtualBox client (and this won't apply to most readers, who will instead be installing onto a 'real' target PC), please note the following:
- You cannot simply set
VIDEO_CARDS="vesa"when using VirtualBox with EFI emulation turned on.[9] You need to useVIDEO_CARDS="fbdev virtualbox vmware"instead. Then, for best results, enable CONFIG_DRM_VMWGFX and CONFIG_DRM_VMWGFX_FBCON in the kernel, and opt to use VMSVGA (or, as a fallback, VboxSVGA) as the VirtualBox graphics controller. - Under EFI boot, you may find it more reliable to use ALSA Audio Driver / Intel HD Audio on your virtual machine (selectable in the VirtualBox control panel, under "Audio").
- It is generally useful to emerge the app-emulation/virtualbox-guest-additions in your guest (and set it to start on boot, via
emerge -v virtualbox-guest-additions && systemctl enable virtualbox-guest-additions), to enable enhanced services (this does not entail installing any binary blobs). Also, if you do use this package, also remember to add your user(s) to the vboxguest group (withgpasswd -a <username> vboxguest). - To get (standard) wayland support, CONFIG_DRM must be enabled in the kernel, along with CONFIG_DRM_TTM. The simplest way to do this (for a VirtualBox guest) is to enable support for one of the 'normal' graphics card drivers (e.g. CONFIG_DRM_VMWGFX or CONFIG_DRM_VIRTIO_GPU), in the later kernel configuration section (this is safe to do, even if the enabled driver won't be directly used (as for e.g., CONFIG_DRM_VIRTIO_GPU)).
- To show the graphical plymouth LUKS password splash screen at boot, enable CONFIG_FB_SIMPLE in the kernel.
- The VirtualBox video drivers are notoriously awkward to emerge with parallelism and it is possible they will break your x11-base/xorg-server build. If this occurs, just retry as follows (note the explicit citation of x11-base/xorg-drivers, to ensure that these are correctly built):
(1) koneko ~ #MAKEOPTS="" emerge --verbose --oneshot x11-base/xorg-drivers x11-base/xorg-server
Temporarily Installing an X11 Window Manager and Applications
To be able to test out X11, we'll need to install a window manager, and a few X11 applications.
Keeping things simple here, we'll use the (minimalist) Tab Window Manager (TWM) (x11-wm/twm), and the following apps:
- x11-apps/xsetroot: a background ('root') window parameter setting utility for X;
- x11-apps/xclock: a simple clock display for X; and
- x11-terms/xterm: the standard terminal emulator for X.
Issue:
(1) koneko ~ #emerge --ask --verbose x11-wm/twm x11-terms/xterm x11-apps/xclock x11-apps/xsetroot
... additional output suppressed ...
Would you like to merge these packages? [Yes/No] <press y, then press Enter>
... additional output suppressed ...
These are small programs, and shouldn't take long to download, compile or install.
Enabling the Kernel DRM Driver for your Graphics Card
Next, since wayland requires you to have an appropriate Direct Rendering Manager ('DRM') kernel driver for your PC's graphics card installed, in this section we'll reconfigure your kernel accordingly, rebuild it, and then reboot.
Technically, you don't need DRM for wayland itself, since it is e.g., also possible use the standalone dev-libs/weston compositor to render to an fbdev — or alternatively to an X11 — back end. Nevertheless, for most PC use-cases (and for a sane configuration using GNOME's mutter compositor) the DRM route is strongly recommended, so that's what we'll follow here.
What's more, for most modern graphics cards, you'll need a DRM driver for efficient X11 support too, which is why we're going to reconfigure and rebuild the kernel now, before testing either platform.
Your presently running kernel, the configuration of which was based upon the Gentoo minimal install image's, does not currently have any DRM components enabled. We'll fix that problem in this section also.
Two commonly used DRM/DRI KMS drivers are:
- the DRM_I915 driver; this is needed for the integrated "HD Graphics" on many Ultrabooks (such as the Panasonic CF-AX3); you'll need to activate it if you have an "intel", "intel i915" or "intel i965" VIDEO_CARDS setting in /etc/portage/make.conf;
- the DRM_NOUVEAU driver; this is an open-source driver that supports many nVidia graphics cards (which are popular on desktop machines); you'll need to activate it if you have a "nouveau" VIDEO_CARDS setting in /etc/portage/make.conf.
(There are others too, of course, these are simply the most frequently encountered.)
To determine what graphics card you have (if unsure), you may find that issuing (as root):
(1) koneko ~ #lspci | grep -i VGA
and
(1) koneko ~ #hwinfo --gfxcard
is inserted into the target machine, and then issue (from the ssh/screen virtual terminal):
(1) koneko ~ #buildkernel --menuconfig
Because you have not specified --ask here, but you have specified --menuconfig, the process will run through by itself (assuming no errors) to the point where you can modify the kernel configuration using the standard curses-based editor GUI.
The configuration changes you need to make will vary depending on the driver(s) you need to enable. The following is a step-by-step guide for modern laptops (and other PCs) with Intel integrated HD graphics (following this wiki page). If you require a different driver, modify these instructions accordingly.
First, some background. The menuconfig system is a simple tool used to modify Linux kernel configurations (aka ".config" files) in a coherent manner. The tool will not let you make inconsistent choices, and has a useful search facility.
For more information on menuconfig, refer to Chapter 4 of Greg Kroah-Hartman's Linux Kernel in a Nutshell[10], the Gentoo wiki page, and Bruce Dubbs' "Considerations when configuring the Linux kernel" from Linux from Scratch[11].
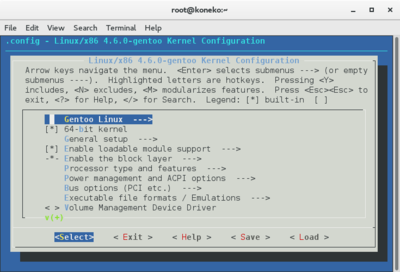
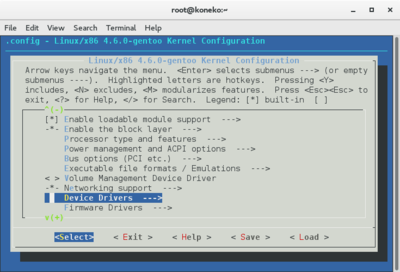
When menuconfig starts up, it will present you with a display similar to the below (your version may vary depending on currently selected options and kernel version):
You can navigate the interface as follows:
- Use the up and down arrow keys to move your selection (highlighted in blue) in the top pane;
- Use the left and right arrow keys to traverse the bottom (horizontal) menu, which defines what happens when you press Enter, viz.:
- <Select> enters a sub-menu, for items (in the top pane) ending with --->, or brings up a text entry box for items which start with round brackets "()";
- <Exit> exits a sub-menu; if at the top level already, asks you whether to save changes (if you have made any) and exits the program; you can also press Esc then Esc to perform this action;
- <Help> shows a help screen that is relevant to the (top pane) selection; you can also press h for this;
- <Save> saves the current configuration; and
- <Load> allows you to load a new configuration.
Items starting with non-round brackets represent features which can be enabled, as follows:
- [ ], [*]
- Square brackets indicate features that are deactivated (blank) or activated (asterisk). Press Space to toggle status, or y to activate, n to deactivate. Activated items are built directly into the kernel; deactivated items are omitted from it entirely.
- < >, <M>, <*>
- Angle bracketed items can similarly be deactivated (blank) or activated (asterisk), but can additionally be built as modules ("M") (modules are object files designed to be dynamically loaded into a running kernel on an as-needed basis). In addition to Space, y and n, you can use m with such items to specify that they should be modularized.
- {M}, {*}
- Curly brackets indicate items which cannot be deactivated (due to another item's dependency). However, they may be activated or modularized (using y, m or Space, as before).
- -M-, -*-
- Similarly, hyphens indicate items whose status cannot be changed (their selection having been forced as the result of another item choice).
At times, you may find that certain choices are impossible, despite the bracket coding, because of other choices you have made. For example, you may not be able to activate an element, only modularize it, if one of its dependencies is modularized (rather than selected). In such cases, menuconfig will tell you that your choice is restricted, and why.
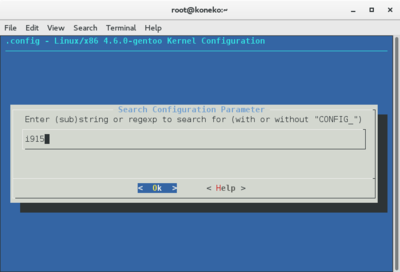
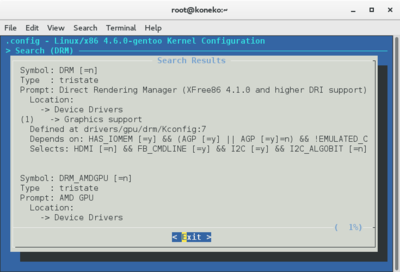
To search, press / and then type your search term. This is a very useful facility when looking for missing drivers etc. For example, since we are here looking for the i915 driver, press / then type in i915, then press Enter to see the search results:
As mentioned, the following assumes you want to add the Intel DRM_I915 driver to your kernel. If your target PC requires a different driver, for example DRM_NOUVEAU (for nVidia cards), you will need to modify these instructions accordingly.
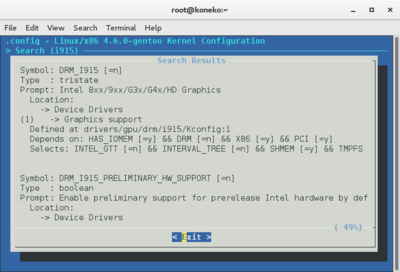
You can scroll through the results using the arrow keys. Doing so in this case, we discover that (inter alia):
- Four items are returned (your results may differ, depending on kernel version), of which the first and third (DRM_I915, and DRM_I915_USERPTR) are relevant;
- The output shows that (e.g.) the DRM_I915 item (which will appear in the /usr/src/linux/.config file as CONFIG_DRM_I915) is to be found under the Device Drivers menu, by following down into the Graphics Support submenu. We also see that its prompt in the upper-pane menu will (as is common with this software!) will be distinct from the DRM_I915 name (it will actually appear as "Intel 8xx/9xx/G3x/G4x/HD Graphics").
- The dependencies of this driver are also shown (you can drag the ssh terminal window on your helper machine wider to see any that may have been clipped off). Generally, for an item to be available for selection or modularization, all its dependencies must be satisfied: either selected (=y, the same as an asterisk) or modularized (=m). In some cases, items whose dependencies are unsatisfied will not be visible other than through a search like this.
This last point bears repeating, since it confuses many first-time users: an item will often not even appear in menuconfig's top pane until its dependencies have been satisfied, even when it shows up in the results of a search. It would be nice if menuconfig would allow us to activate/modularize "an item and all its dependencies, transitively" from the search results screen, but it currently cannot, so we must perform this depth-first recursion manually.
OK, so let's work through the DRM_I915 case as a concrete example. From the search just performed we can see that, of the requirements for DRM_I915, only the DRM item is currently deselected. Well then, let's investigate DRM: we hit Enter to exit current search, then / to search again, and type in DRM and press Enter. The item we want here is the first result term. All its dependencies appear satisfied in the current configuration, and we note also that it appears under "Device Drivers -> Graphics support", that its prompt is "Direct Rendering Manager (XFree86 4.1.0 and higher DRI support)", and that it is currently unselected ([=n]):
Now we know there are no further unsatisfied dependencies for DRM_I915, we can activate DRM, and then DRM_I915 itself.
There's a handy shortcut you can often use when searching in menuconfig: if the result you are interested in has a parenthesised number shown by it near the left margin, such as (1), (2) etc., then you can simply press the corresponding number key (1, 2, etc.) to jump directly to the item in question. Then, once you're done editing it, pressing Esc then Esc will bring you back to the search results again. In the below text, we're going to do things the longhand way, for clarity, but using the number-key shortcuts is usually a better way to go, once you are familiar with the
make menuconfig flow.Remember, to use wayland, you must ensure that DRM is enabled!
Further to the above, if you are installing onto a VirtualBox client (and this won't apply to most readers, who will instead be installing onto a 'real' target PC), please note that DRM_TTM must be enabled in the kernel, in order to use the vboxvideo out-of-tree kernel module. As it happens, selecting DRM_I915 isn't sufficient to select this — to do so, you'll need to select a different dummy 'real' driver (I recommend modularizing CONFIG_DRM_VIRTIO_GPU for this purpose).
There's no harm (other than increased kernel size) in selecting multiple DRM drivers, if you are unsure about which to use. Indeed, you may need to do so, if you have more than one type of graphics card in your system.
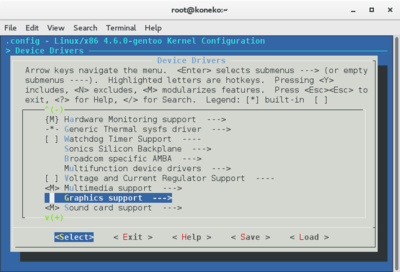
Begin by pressing Enter to exit the current search, then use the arrow keys to navigate to the "Device Drivers" item (if not visible to begin with, the top pane will scroll as you arrow down), then press Enter to enter the submenu. Next, repeat the process to select the "Graphics support" item, and press Enter:
If you are unsure of an item, you can press ? when it is highlighted; this will show its help information, including symbol name.
One other point to bear in mind is that any symbol, for example DRM_I915, will have a CONFIG_ prefix attached when written out to a .config file. You will occasionally see these CONFIG_ prefixes appear in the help text too (in point of fact, the help for DRM_I915 refers to it as CONFIG_DRM_I915). However, don't be confused: CONFIG_DRM_I915 is the same as DRM_I915.
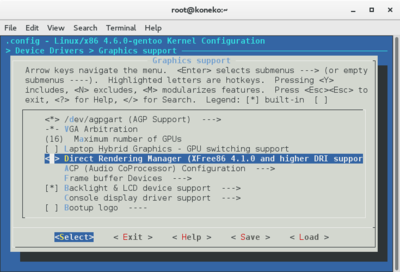
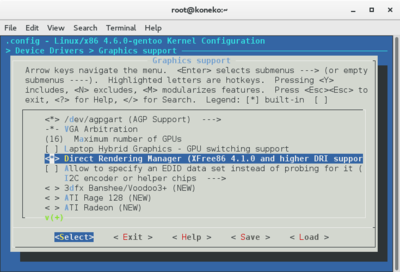
If you do press ? to view an item's help text, just press the Enter when you are finished reading, to close it and go back.Now, move to the "Direct Rendering Manager (XFree86 4.1.0 and higher DRI support)" item. This is the DRM symbol we want (as just mentioned, you can verify using ? if you like). Press y to enable it (this causes a number of subitems to appear, and also enables this entry itself as a submenu heading (not obvious unless you drag your window wider than the default 80 columns, so you can see the ---> suffix that appears post-selection):
We're taking the approach of selecting required components directly (requesting they be built into the kernel itself), rather than modularizing them, but this is generally not mandatory. buildkernel copies all modules into the initramfs, so whether or not to modularize is ultimately up to you - it will have no effect on your ability to boot (certainly for elements like this that were disabled in the minimal install configuration to begin with).
Further to the above, for certain video cards which require a runtime firmware upload (such as more modern AMD/ATI Radeon units using the "amdgpu radeonsi" VIDEO_CARDS flags), it is actually preferable to specify the necessary kernel drivers as modules (rather than building them in). This avoids having to explicitly compile firmware into the kernel (buildkernel copies all modules and firmware into the initramfs anyway, so this is safe to do).
If you have a Intel-CPU-based laptop that is badged as having a Radeon GPU (as does, for example, the Dell Inspiron 5567 15), you may find you need to proceed as if you had a system with standard integrated "Intel HD Graphics"; i.e., specifying "intel i965" for VIDEO_CARDS in /etc/portage/make.conf (then rebuilding @world if necessary), turning on CONFIG_DRM_I915 in your kernel etc.
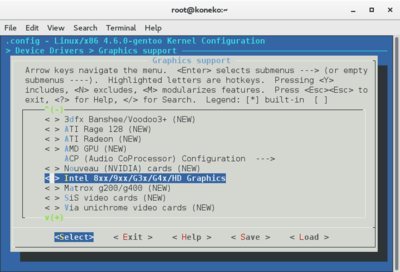
So, now that we have set DRM, we can proceed to enable DRM_I915 itself. Navigate down the Graphics support menu, through the new items that appeared when you selected DRM, until you reach the Intel 8xx/9xx/G3x/G4x/HD Graphics item (if you think this feels rather like a 70's era adventure game, you're not alone!):
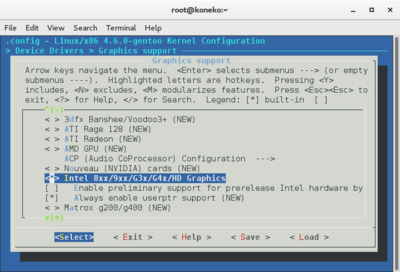
You can verify that this is indeed the DRM_I915 item, by using ? if you like; then, press y to enable it:
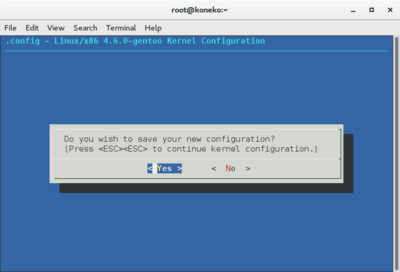
And that's it, you're done. Hit Esc then Esc to come back out to the "Device Drivers" menu. Hit Esc then Esc again to come back out to the top-level menu. Finally, hit Esc then Esc again, to exit the program. When prompted, ensure <Yes> is selected, and press Enter to save the new configuration and quit menuconfig:
Once you have exited menuconfig, buildkernel will automatically create a kernel with the newly created configuration, sign it, and copy it over to the boot USB key. Wait for the process to complete (you get the message "All done!"). Then issue:
(1) koneko ~ #exit
which will close the first screen terminal, then:
(2) koneko ~ #exit
to close the second one. Then, ensure the boot USB key is still inserted in the target machine and restart it, by issuing:
koneko ~ #systemctl reboot
If you have problems rebooting with this new kernel, you can follow the instructions given earlier to revert back to the backup (previous) version on the boot USB key - which won't have your configuration changes - and try again.
It's useful to relate the process just described to the 'kernel configuration shorthand' you will often see on the Gentoo wiki, and many other places on the web. For example, looking at the "intel" page on the wiki, we read that you need to enable the following kernel options:
Device Drivers  --->
            Graphics support  --->
                <*> /dev/agpgart (AGP Support)  --->
                    --- /dev/agpgart (AGP Support)
                    ...
                    -*-   Intel 440LX/BX/GX, I8xx and E7x05 chipset support
                    ...
                ...
                <*> Direct Rendering Manager (XFree86 4.1.0 and higher DRI support)  --->
                    --- Direct Rendering Manager (XFree86 4.1.0 and higher DRI support)
                    [*]   Enable legacy fbdev support for your modesetting driver
                ...
                <*> Intel 8xx/9xx/G3x/G4x/HD Graphics
                [ ]   Enable preliminary support for prerelease Intel hardware by default
                ...
                -*- Backlight & LCD device support  --->
                ...
This is really just informing you of the menu locations (and prompts) of the options you need to choose, and how to set them (here, all have asterisks, so implying you should ideally select, rather than modularize). All of the above should be familiar from the process just described, those that we didn't cover are either selected by default on the current Gentoo minimal install kernel configuration, or are automatically selected by DRM_I915.
Generally speaking, when presented with a configuration list like this, you can just work through the menus in the order provided and enable the items - the author will have done the 'depth first' dependency pass for you. However, this isn't foolproof, so if an item referred to in such a list appears missing, simply search for it, and check that its dependencies are set, as we have done above.
Remember also that symbols do get dropped from (and obviously, added to) the kernel configuration set over time, so if you are working from an old set of instructions, a specified item may have been obsoleted and removed. Do an internet search if unsure.
There's some further information about the kernel configuration shorthand notation on the Gentoo wiki.
In the later part of this tutorial, I will assume that you are able to translate these 'shorthand' kernel configuration recipes, usingbuildkernel --menuconfig, without spelling out the process step-by-step. If in doubt, please re-read this section. (And if you are reading this now because you were jumped back to this section from a later chapter, you can click here to return - otherwise, just continue reading!)When the machine restarts, as before, you will need to enter your LUKS keyfile gpg passphrase (the one you created earlier), directly at the target machine keyboard.
Once this has been completed successfully, and the target machine is restarted, from the helper PC, log back in again via ssh:
user@pc2 $ssh root@192.168.1.106
Password: <enter root password>
... additional output suppressed ...
Substitute whatever IP address you got back from ifconfig earlier for
192.168.1.106 in the above command. It is possible (although unlikely, with modern DHCP) that the target's IP address will have changed during the reboot. If so, log in directly at the target machine's keyboard, use ifconfig to find out the new address, then issue the above ssh command citing that address. As before, in such a case you may need to clean out any previous record of ssh connections to (other machines at) that new address (since the fingerprints will not match), using:
user@pc2 $sed -i '/^[^[:digit:]]*192.168.1.106[^[:digit:]]/d' ~/.ssh/known_hosts
192.168.1.106 in the above. Then, be sure to check the fingerprint when prompted (by the subsequent ssh command), against those you noted down earlier.If installing over WiFi, and you had to manually restart wpa_supplicant in the previous two chapters, then you'll need to do so again here (directly at the target machine's keyboard) before you'll be able to ssh in.
Then, re-establish screen (enter all commands via the ssh console from the helper PC, unless otherwise stated). Issue:
koneko ~ #screen
koneko ~ #export PS1="(1) $PS1"
to start screen. Then, press Ctrla then c to start a new virtual console, and in that new console enter:
koneko ~ #export PS1="(2) $PS1"
Now hit Ctrla then p to get back to the original console.
Verifying the DRM Driver Is Activated
Next, we'll check that your system now has an active DRM graphics driver (and not just e.g., a fallback fbdev framebuffer), as this is a prerequisite for running GNOME 3 over wayland. Issue:
(1) koneko ~ #hwinfo --gfxcard | grep "Driver:"
Driver: "i915"
The output you get will obviously depend upon your graphics card, for example, it might be Driver: nouveau instead, if you have an nVidia card.
Remember, too, that this is the kernel driver name: it is not necessarily the same as the value(s) you need to set in the VIDEO_CARDS variable via /etc/portage/make.conf (which in turn controls e.g., some of the USE flags on media-libs/mesa, thereby configuring its userland driver set).
For example, with a modern HD-graphics based PC, you'd probably have CONFIG_DRM_I915 set in the kernel (as per our worked example),
hwinfo --gfxcard would report i915 as the active driver, yet you would have VIDEO_CARDS="intel i965" set in /etc/portage/make.conf (building mesa with the video_cards_intel and video_cards_i965 USE flags thereby).Next, search for messages from the DRM subsystem citing this driver name, in the kernel ring buffer. Issue:
(1) koneko ~ #grep --ignore-case "i915" <(dmesg) | grep --fixed-strings '[drm]'
[ 0.371760] [drm] Initialized i915 1.6.0 20170818 for 0000:00:02.0 on minor 0
Substitute the driver name you received from the
hwinfo --gfxcard invocation for i195 in the above command.Again, the output you see will differ, but the important thing to verify is that that your DRM driver has been initialized.
If you have multiple graphics cards in your PC, and you want to use all of them under wayland, make sure a DRM driver has been successfully initialized for each one.
If, you see no matching [drm] message output from the grep (or if the earlier hwinfo --gfxcard produced an error), then you have not installed the correct driver. In this case, you need to go back to the start of the previous section now, and try again.
However, assuming it did work (the more usual case), as a final sanity-check, list the activated DRM_ components present in the configuration of your running kernel. Issue:
(1) koneko ~ #zgrep 'CONFIG_DRM.*=' /proc/config.gz
CONFIG_DRM=y
CONFIG_DRM_MIPI_DSI=y
CONFIG_DRM_KMS_HELPER=y
CONFIG_DRM_KMS_FB_HELPER=y
CONFIG_DRM_FBDEV_EMULATION=y
CONFIG_DRM_I915=y
CONFIG_DRM_I915_USERPTR=y
CONFIG_DRM_PANEL=y
CONFIG_DRM_BRIDGE=y
If the above command returns an error, you may need to run (as root)
modprobe configs first, in order to make the kernel configuration file visible within the special /proc filesystem.[12]For avoidance of doubt, most users should not need to do this, however.
Your output may well differ, depending on the configuration choices made earlier, but check that CONFIG_DRM and at least one specific driver (here CONFIG_DRM_I915, but yours might be CONFIG_DRM_NOUVEAU, etc.) are either built-in (shown as =y) or modularized (shown as =m).
Users installing onto a VirtualBox target (and this won't apply to most readers, who will instead be installing onto a 'real' PC) will be looking for CONFIG_DRM_VMWGFX or CONFIG_DRM_VIRTIO_GPU here (which we suggested including above).
If that isn't the case, jump back to the Enabling the Kernel DRM Driver for your Graphics Card section now, install an appropriate DRM driver, and try again.
However, if (as is likely) everything checked out fine, then keep reading!
Testing X11
Before we can try out X11, we need to instruct it which window manager to use, and what apps to launch, when starting up. The ~/.xinitrc file is used for this purpose. As it's generally not a great idea to run an X server directly as root, we'll create this in the home directory of the regular user we've just created (and then invoke X as that user). However, under systemd, being able to do so requires a permissions modification[13] (which we'll make temporarily).
Still via ssh/screen console, issue:
(1) koneko ~ #chmod u+s /usr/libexec/Xorg
The above sets the SUID bit on the file /usr/libexec/Xorg.[14] Normally in Linux, when a program runs, it inherits access permissions from the logged in user. When the SUID bit is set however, users will get the file owner’s permissions as well as owner's UID and GID when executing it.
Next, log in directly at the target machine's keyboard, as the regular user you created previously. Enter your user name at the console prompt (in our case, 'sakaki', without quotes) then press Enter, then, when prompted, type the password you set up for this user, and press Enter again.
Substitute the user name of the regular user you created in the earlier step for sakaki in the above instructions. You need to be logged in directly at the machine's console (and not via ssh, or using su) for the following startx to work inside systemd.
Then, (continuing to working directly at the machine's keyboard) edit the .xinitrc file in the regular user's home directory. Issue:
sakaki@koneko ~ $nano -w ~/.xinitrc
Obviously, the name that you see in the prompt will reflect that of the regular user you added (and which you just logged into).
Put the following text in the .xinitrc (replacing the current contents, if any):
~/.xinitrcA basic setup to start TWM and some simple applications#!/bin/sh
LANG=C twm &
xsetroot -solid CornflowerBlue &
xclock -geometry 100x100-1+1 &
xterm -geometry 80x50+494+51 &
xterm -geometry 80x20+494-0 &
exec xterm -geometry 80x66+0+0 -name login
Save and exit nano.
The above shell script simply instructs X to:
- start the Tab Window Manager (twm) as a background process;
- set the background colour to "CornflowerBlue" (also backgrounded, but will exit quickly);
- show an analogue clock, of size 100x100 pixels, offset 1 pixel from the right side of the screen and 1 pixel from the top (as a background process);
- show a terminal, of size 80x50 characters, offset 494 pixels from the left side of the screen and 51 pixels from the top (as a background process);
- show a second terminal, of size 80x20 characters, offset 494 pixels from the left side of the screen and 0 pixels from the bottom; and
- then execute a third terminal, of size 80x66 characters, offset 0 pixels from the left, top corner of the screen (replacing the calling process). This terminal has name 'login' and, when terminated, the X session will close.
Now we are finally ready to try out X11!
Remember, if you decided to change your VIDEO_CARDS setting (wrt that which you originally entered when setting up /etc/portage/make.conf), then you will need to issue:
(1) koneko ~ #emerge --verbose --deep --with-bdeps=y --changed-use --update @world
Still working directly at the machine's keyboard, issue:
sakaki@koneko ~ $startx
If all goes well, the screen of your target PC should now be displaying something like the below:
(The actual layout will depend upon the geometry of your display.)
If your screen appears rotated (perhaps because you are using a monitor in portrait, rather than landscape, orientation), then you can fix this using the xrandr utility. Although this is not critical to install at this stage — since we'll be replacing X with GNOME over Wayland shortly — you can do so if you wish. To do do, issue (as root):
koneko ~ #emerge --verbose x11-apps/xrandr
start twm& line:
~/.xinitrcExample monitor rotation fix (add after twm &)xrandr --rotate right
startx again (other rotations are available besides right, please see the xrandr manpage).For avoidance of doubt, most users will not be affected by this issue, and can safely ignore the contents of this tip.
If you get an error instead, remember that the most likely problem preventing X11 from starting up, is a missing kernel graphics driver. As such, simply go back to the previous section, and add the appropriate (DRM) driver now — it may be that you simply chose the wrong one the first time around. For avoidance of doubt, there's no harm (other than the impact on kernel size!) in enabling more than one such DRM driver, if you're not exactly sure which is correct.
Remember, if you add or change kernel DRM drivers, you'll also need to modify (or simply augment) your VIDEO_CARDS variable to match (in /etc/portage/make.conf). Once done, you will then need to issue:
(1) koneko ~ #emerge --verbose --deep --with-bdeps=y --changed-use --update @world
This won't be necessary for most users but, if after having run through the kernel configuration/rebuild/reboot and VIDEO_CARDS settings loop a few times, you still can't get X11 to start up, have a look at the Gentoo wiki page on X11 configuration, which contains some useful pointers. You may also find the content of the /var/log/Xorg.0.log log file helpful, when trying to determine in more detail what went wrong. Double check that you haven't introduced any obvious syntax errors in your ~/.xinitrc file as well.
To reiterate however: with a modern X setup, problems are almost always as a result of missing kernel graphics drivers (or possibly incorrect VIDEO_CARDS or INPUT_DEVICES variables in /etc/portage/make.conf), rather than an erroneous X configuration per se.
Assuming you can see the simple desktop displayed, next check that you can move the cursor around (using the target machine's mouse or touchpad), and try typing some simple commands (e.g. "ls /bin") into any of the three terminal windows. When done, move your cursor into the longest (leftmost) terminal, so that it receives the focus (its cursor will switch to a filled rectangle), and type (directly at the target machine's keyboard):
sakaki@koneko ~ $exit
On the ssh/screen console (at your helper PC), you should now see that the startx program has exited (and a lot of status output will have been written to the console too).
If you have problems, the X server can always be closed from the ssh window, by issuing pkill Xorg.
If everything has checked out so far, then congratulations, GNOME 3 should be able to work fine over both X11 and Wayland on your system.
Conclude these tests by logging out of your regular user. Directly at the target machine's keyboard, issue:
sakaki@koneko ~ $exit
Installing GNOME 3
The validation of prerequisites behind us, we will next perform some clean up, then proceed to the GNOME installation itself.
Let's begin by removing the temporary X window manager and applications (which we installed, for testing purposes only, earlier).
Continuing to work within the ssh/screen console, issue:
(1) koneko ~ #emerge --ask --verbose --depclean x11-wm/twm x11-terms/xterm x11-apps/xclock x11-apps/xsetroot
... additional output suppressed ...
Would you like to unmerge these packages? [Yes/No] <press y, then press Enter>
... additional output suppressed ...
Using the
--depclean option to emerge in this way is a common idiom to safely uninstall packages in Gentoo. If any of the specified atoms happens to be a dependency of another (uncited) installed package (even transitively), it will not be removed.Next, decide whether you wish to disable GNOME's "tracker" file and search indexing framework (it is enabled in GNOME by default). Two reasons you may wish to do so are:
- it runs content-based indexing on your filesystem, which can create high CPU loading for densely-populated media;[15][16] and
- there is a self-evident privacy (and attack surface) issue presented by using such software.
If tracker is disabled, the packages gnome-extra/gnome-documents, media-gfx/gnome-photos and media-sound/gnome-music (which rely upon it) will not be installed as part of GNOME.
With modern GNOME, even if you disable the tracker USE flag, it will still be installed as it is a hard dependency of gnome-base/nautilus, the default file manager for the GNOME desktop. The further measure required to stop it running at all (should you elect) will be described later in the chapter.
If you decide you'd rather retain tracker, click here to skip the following optional step.
Otherwise, to disable it, issue:
(1) koneko ~ #nano -w /etc/portage/make.conf
and then append the following lines to that file:
/etc/portage/make.confAppend lines to disable GNOME's tracker infrastructure# Globally disable GNOME's tracker software.
USE="${USE} -tracker"
Leave the rest of the file as-is. Save, and exit nano.
As the tracker USE flag is used by a number of applications, we set it globally here, rather than in /etc/portage/package.use/gnome-extra-apps.
Now we are ready to install GNOME!
It is not unusual for the following large emerge to fail to complete on the first attempt, given the degree of build parallelism we are using. We will provide a strategy to address any build failures, however, so don't be concerned.
Issue:
(1) koneko ~ #emerge --ask --verbose --keep-going gnome-base/gnome && echo "GNOME emerged OK" || echo "GNOME emerge not yet completed"
... additional output suppressed ...
Would you like to merge these packages? [Yes/No] <press y, then press Enter>
... additional output suppressed ...
If, when attempting the emerge, you are prompted with a series of missing package-specific keywords, USE flags, licences, or masks, followed by the question:
... additional output suppressed ...
Would you like to add these changes to your config files? [Yes/No]
As before, you can switch to the second screen console we prepared earlier, to watch the progress (as the files download, build etc.). Hit Ctrla then n to switch to the second console (you can do this while the emerge is running), and issue:
(2) koneko ~ #showem
The emerge will take quite some time to complete! Note that the --keep-going option instructs emerge to build as much as possible, even if some errors are encountered. This is a useful approach in general with large builds (it can be omitted during the subsequent 'clean up' emerge runs, should any be necessary, as we shall see).
If the above emerge concluded with the output GNOME emerged OK then congratulations, you have successfully installed GNOME, and should now click here to skip to the next step.
If however, it concluded with GNOME emerge not yet completed, most likely accompanied by a message near the end of the output that:
... additional output suppressed ...

* The following <n> packages have failed to build, install, or execute postinst:

... additional output suppressed ...
(or similar) then you have encountered a build issue, so read on.
Most often, any failures will be caused by the high level of make parallelism we are using. These glitches are often non-deterministic in nature and accordingly, as a first step it is worth simply retrying the build. Issue :
(1) koneko ~ #emerge --ask --verbose gnome-base/gnome && echo "GNOME emerged OK" || echo "GNOME emerge not yet completed"
... additional output suppressed ...
Would you like to merge these packages? [Yes/No] <press y, then press Enter>
... additional output suppressed ...
For avoidance of doubt, any package dependencies that did build successfully first time will not be unnecessarily rebuilt by the above command.
You may need to repeat this step multiple times to get GNOME emerged successfully (I have found three or four iterations may be necessary). As long as the 'packages to be installed' count keeps falling, keep trying ^-^
If, after working through this process, you are finally rewarded with the output GNOME emerged OK then congratulations, you have successfully installed GNOME — click here to skip to the next step.
If, on the other hand, you find yourself 'stuck' with one or more packages that seem to fail every time (and the build finishes by outputting GNOME emerge not yet completed), reissue the emerge, but this time without make parallelism:
(1) koneko ~ #MAKEOPTS="-j1" EMERGE_DEFAULT_OPTS="--jobs=1" emerge --ask --verbose gnome-base/gnome && echo "GNOME emerged OK" || echo "GNOME emerge not yet completed"
... additional output suppressed ...
Would you like to merge these packages? [Yes/No] <press y, then press Enter>
... additional output suppressed ...
Again, you may need to repeat this step multiple times (and should do so as long as the 'packages to be installed' count keeps falling).
When you get more experienced with Gentoo, you'll be able to determine which types of build error are likely indications of an ephemeral parallelism problem, and which are just plain bugs (unlikely for packages on the 'stable' branch, but always possible).
If the restricted parallelism emerge finishes with the output GNOME emerged OK then congratulations, you have successfully installed GNOME — click here to skip to the next step.
However, if, after all this, you still experience build errors emerging gnome-base/gnome (the restricted parallelism emerge finishes by outputting GNOME emerge not yet completed), you may find it useful to refer to these earlier notes. It is also possible to emerge the smaller package gnome-base/gnome-light (instead of gnome-base/gnome), and then add applications later. Take the necessary steps and then rejoin the tutorial here when ready: in what follows, I am going to assume that you have successfully installed GNOME.
Once the build process has completed successfully, ensure you are back in the virtual terminal from where you issued the emerge command (i.e., not the showem virtual terminal / console), and then issue the following to ensure your environment is up-to-date post-install:
(1) koneko ~ #env-update && source /etc/profile && export PS1="(1) $PS1"
Hit Ctrla then n to go to the second screen console, and do the same there. Issue:
(2) koneko ~ #source /etc/profile && export PS1="(2) $PS1"
Then press Ctrla then p to switch back to the original console again.
Make sure any regular users are members of the plugdev group (if it exists on your target machine). Issue:
(1) koneko ~ #getent group plugdev && gpasswd -a sakaki plugdev
Substitute the user name of the regular user you created in the earlier step for sakaki in the above command. If you add other regular users, be sure to add them to plugdev in a similar manner. This is to allow full access to NetworkManager services, which require the plugdev group.[17]
If you wish your regular user to be able to play the GNOME games (assuming you have chosen to install them), then issue (this is optional):
(1) koneko ~ #getent group games && gpasswd -a sakaki games
Again, substitute the user name of the regular user you created in the earlier step for sakaki in the above command.
Next, we need to log back in as our regular user, and try out our new desktop! Directly at the target machine's keyboard, enter your user name at the console login: prompt (in our case, 'sakaki', without quotes) then press Enter; then, when prompted, type the password you set up for this user, and press Enter again.
Substitute the user name of the regular user you created in the earlier step for sakaki in the earlier instructions. You need to be logged in directly at the machine's console (and not via ssh, or using su) for the following startx to work inside systemd.
Next, (still working directly at the machine's keyboard) edit the .xinitrc file in the regular user's home directory. Issue:
sakaki@koneko ~ $nano -w ~/.xinitrc
Obviously, as before, the name that you see in the prompt will reflect that of the regular user you added (and which you just logged into).
Delete the current contents of .xinitrc (you can use Ctrlk inside nano to delete a line at a time), and replace with the following text:
~/.xinitrcReplace existing text with the below to start GNOMEexport XDG_MENU_PREFIX=gnome-
exec gnome-session
Save and exit nano.
Don't forget the hyphen at the end of gnome- (as shown above). Also, note that there is no need to start the file with a shebang this time.
OK, time to try it out! To begin with, we'll start GNOME running under X11, with no login manager. Issue:
sakaki@koneko ~ $startx
And hopefully you should be greeted with a (rather startlingly empty!) GNOME 3 desktop, somewhat similar to the below, on the target machine:
The precise layout etc. that you see may of course differ, due to version changes in GNOME. Also, you may experience some issues the first time you try running GNOME in this manner (strange display glitches etc.); if so, simply try quitting (by pressing Windows Key and then typing
logout followed by Enter, selecting the Log Out button on the presented dialog, waiting for the console prompt to return, and then running startx (directly at the target machine's keyboard) again.You can try playing around with it briefly if you like (some simple instructions may be found here - or just get started by moving your mouse pointer up to the top left corner of the screen (and optionally, clicking on 'Activities'), or by pressing Windows Key), using the target machine keyboard and mouse / touchpad directly. Note, however, that this isn't a properly logged-in instance, so certain of the standard features will not function as you expect. You should be able to start a terminal etc. however.
If your screen appears rotated when logged in under GNOME under wayland, you don't use xrandr to fix it (as described earlier), instead press the Windows Key, then type
displays and press Enter. You should then be able to choose an orientation for your primary display.When you're done, return back to the console prompt, by pressing Windows Key and then typing logout followed by Enter, then selecting the Log Out button on the presented dialog. Then (still working directly at the machine's keyboard) log out of the console session for your regular user too; issue:
sakaki@koneko ~ $exit
Finally, working back at the ssh/screen console again, undo the temporary permissions change made earlier. Issue:
(1) koneko ~ #chmod u-s /usr/libexec/Xorg
Testing GNOME 3 on Wayland (and Refining Settings)
Congratulations, GNOME 3 is now basically functional; we only need a few more steps to get it fully operational on your machine! So, let's continue.
First, we must enable the NetworkManager service (which will handle all network interaction under GNOME), and disable the dhcpcd service, which we started earlier (and whose functionality NetworkManager supplants). First, issue:
(1) koneko ~ #systemctl stop dhcpcd
(1) koneko ~ #systemctl disable dhcpcd
As before, with systemd's systemctl command, you use:
- stop to stop a running service immediately;
- disable to ensure a service doesn't start at boot time;
- enable to ensure a service will (try to) start at boot time; and
- start to run running a service immediately.
Next, if you are using WiFi for the install, you'll also have explicitly set up a wpa_supplicant configuration file earlier in the tutorial, and so you need to remove this again now (however, skip this step if installing over a wired Ethernet connection):
(1) koneko ~ #mv -v /etc/wpa_supplicant/wpa_supplicant.conf /etc/wpa.conf
Now we can ensure NetworkManager comes up on boot (however, do not start it yet, since you may lose network connectivity when you do). Issue:
(1) koneko ~ #systemctl enable NetworkManager
That having being done, we need to make sure that the GNOME Display Manager (gdm) is configured to run on boot (and also, we'll start up an instance now, together with NetworkManager). Issue:
(1) koneko ~ #systemctl enable gdm
(1) koneko ~ #systemctl start NetworkManager && systemctl start gdm
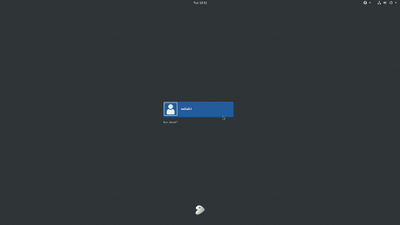
Assuming that worked, you should now be able to see a GNOME login screen on the target machine, similar to the below:
If you don't see your regular user's user name appear (as for 'sakaki' in the above screenshot), click on the "Not listed?" text, and type in the user name when prompted (directly at the target machine's keyboard)).
You may need to press Enter once or twice (directly on the target machine's keyboard) to see the login prompt, if the screen has blanked.
If you are installing via WiFi, you will temporarily lose connectivity (to ssh etc.) when bringing up NetworkManager in this manner, since it doesn't yet know your network settings. However, once NetworkManager is configured (as described next), you should be able to re-establish the ssh connection.
If you modified your display settings when logged into GNOME earlier, for example to rotate the display orientation, then you can force these settings to be used by gdm also. To do so, simply copy the file /home/<username>/.config/monitors.xml into the directory /var/lib/gdm/.config/, and restart gdm (obviously, substitute
<username> for your regular user here — it would be sakaki for our example system).For avoidance of doubt, most users will not need to resort to this, as their gdm setup will be correct 'out of the box'.
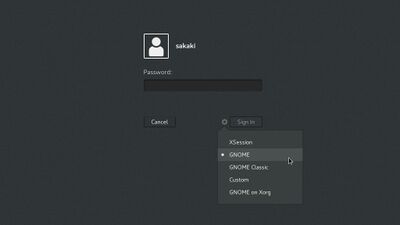
Next, directly at the target machine, click on the (regular) user name tile, then click on the 'cogwheel' icon, and select GNOME from the drop-down menu, as shown:
If you wish to use GNOME on X11 for a particular session (perhaps because you need to use an application that doesn't yet work properly under wayland (even with XWayland compatibility)), then simply choose GNOME on Xorg from the drop-down menu here (NB: this isn't something you should do at this stage in the install, it is just presented here for future reference).
For avoidance of doubt, the XSession menu item is not the correct entry to choose to run GNOME under X11 (as, inter alia, it requires a separate program, x11-apps/xsm, which we do not have installed).
Next, type in the (regular user) password you set up earlier, and click Sign In (or just press Enter).
If your password is rejected, it may be because you do not (yet) have the correct keyboard settings in GNOME (particularly if you have a non-US keyboard, as the Panasonic CF-AX3 does, for example). You can click on the 'man in a circle' accessibility icon in the top bar, and use the on-screen keyboard to enter your password in this case. Afterwards, it is easy to change your keyboard setup via the 'Region & Language' settings panel in GNOME, as described below.
You should arrive back at the GNOME desktop (only this time, with a little more functionality, since this is a normal login session).
Once logged in, you should verify that you are indeed running a wayland session. Directly at the target machine's keyboard, press the Windows Key and type 'terminal', then press Enter. A standard GNOME terminal window should open. Click in it, and then type (inside it):
sakaki@koneko ~ $echo "${XDG_SESSION_TYPE}"
wayland
Assuming you see wayland, as above, all is well. Close out the terminal window now, then click here to proceed with the next step in the install.
However, if instead you saw x11 returned, you have been launched into a legacy X11 GNOME session, not wayland. Given that you have an appropriate DRM kernel driver installed, this indicates an error with your system's userland configuration.
The following points should only be attempted if you could not start a wayland-based GNOME session (as confirmed by the XDG_SESSION_TYPE variable having the value x11, when tested).
To repeat: if you did manage to get GNOME on wayland running successfully, click here instead, to proceed with the next step in the install.
First, check that you have set the correct VIDEO_CARDS entry to match your kernel driver (this is important, because it e.g., sets up the driver-specific USE flags for the userspace media-libs/mesa library). Modify this variable (in /etc/portage/make.conf) if necessary, then (if you needed to make changes), issue (via your ssh/screen connection):
(1) koneko ~ #emerge --verbose --deep --with-bdeps=y --changed-use --update @world
(1) koneko ~ #systemctl restart gdm
and try logging in again.
If you are performing an install over WiFi, and have temporarily lost your connection when NetworkManager was started up (above), you can issue the above two commands at a root terminal opened directly on the machine from within GNOME.
Second, if that was not the problem, and if you have multiple graphics cards (or a 'hybrid graphics' system) installed in your target PC, then note that the time of writing, wayland does not officially support this configuration (and so GNOME will fall back to X11 mode if it is detected). You can override this default, by appending MUTTER_ALLOW_HYBRID_GPUS=1 to the file /etc/environment. Do so now, then reboot, and try logging in again.[18] (Warning: this setting may cause system instability, so don't set it unless you know you have a problem.)
If neither of those suggestions solved your wayland startup problem, then unfortunately it appears that (for some currently unknown reason) you cannot use GNOME with wayland on your machine. You can try posting a question in the Gentoo forums for help. In the meantime, proceed with the rest of the tutorial immediately below, using GNOME under X11 rather than wayland (your desktop will still be fully functional, just somewhat less secure).
Now, and before our final reboot (at which point, we will no longer require the helper PC, but will be using the target machine natively), there are three additional tasks we need to carry out:
- ensuring that network settings are correct;
- setting up keyboard settings are correct within GNOME (if required); and
- ensuring that our the system remembers our volume preferences between reboots.
GNOME Network Settings
You should now make sure that your network settings are correct under GNOME. Any wired connection will most likely have been picked up fine, but if you have been installing using WiFi, you'll need to select an access point, and enter your wireless passphrase, to regain network connectivity.
To do that, simply click on the 'downwards pointing triangle' in very top right of the screen. This will show a drop-down menu, from which you can turn on WiFi, and select an access point (you'll be prompted for the passphrase). (Alternatively, you can press the Windows Key, then type "gnome-settings" (and press Enter), then click on the item titled 'Network' in the panel that appears.) It's a fairly self-explanatory interface, but if you need assistance, simply press F1.
If you start playing around with your system now, you'll probably find that there are a few things, like Bluetooth for example, and possibly even WiFi (if you have been installing over Ethernet, and have a WiFi adapter on your target PC that isn't supported by the minimal install image's fairly minimal default kernel configuration), that are not working yet. That's because we haven't yet enabled all necessary kernel drivers — but we will address this in the next chapter!
Some users have commented that GNOME (and in particular, WiFi) does not come up properly, until their machine is restarted with gdm enabled. Therefore, if you are experiencing any problems with GNOME at this stage (such as your WiFi passphrase being rejected), it may be worth waiting, and trying again once we have rebooted in the final configuration (which we'll do very shortly, below).
Once you have the network set up, you should be able to browse the web etc. Try this now: directly at the target machine's keyboard, press the Windows Key and type 'Web', then press Enter to start the first item shown. GNOME's default web browser will start up (if it initially opens full-screen, you can drag it down by the top bar to make it a normal-sized window). You can then type in a URL etc.:
This browser (called epiphany) is quite basic; as of the time of writing it won't do a great job with more complex sites. For this, consider installing (and sandboxing) a full-scale browser such as www-client/firefox once your system is fully configured and running (but please also have a look at these later notes, if your issue is only a lack of video in epiphany, when viewing sites like YouTube (unlikely to be an issue with modern systems)).
GNOME Keyboard Settings
If you have a non-US keyboard (as in the case of the Panasonic CF-AX3), you will need to set this in GNOME. Press the Windows Key, then type "region" (and press Enter) and click on the Region & Language item in the list. This opens a control panel. Make sure the 'Language' and 'Formats' in the top pane are correct for your locale. Then, add the appropriate 'input source' in the bottom pane. Click on the 'plus' sign icon, and an "Add an Input Source" panel will appear. Click on the tile showing three stacked dots, and drag the panel slightly larger vertically (as otherwise the output will be hidden). You should now be able to click on the 'Other' tile that appears, and then select the required source from the full list, and then click on 'Add' (in my case, I actually added three: "English (UK)" (for my plug-in keyboard), "Japanese" for the machine's built-in keyboard, and "Japanese (Anthy)" for kanji and kana input - obviously, your requirements will probably differ). When done, close out the "Region & Language" dialog.
Once an item , it can be activated via a drop down in the top bar of the screen. In the case of the CF-AX3, you'd want to select 'Japanese' from this list, so that the keyboard mapping is correct (even if you are typing everything in English!) Be sure to check this, if you have problems having your password accepted at the GNOME login screen.
If you have a standard US-layout machine and are using it in the US, this section will probably not apply to you. Nevertheless, you should still check that that the 'Language' and 'Formats' elements are set correctly in the "Region & Language" panel.
GNOME has quite extensive context-sensitive help, which you can access by pressing F1 in any panel (for example, try it with "Region & Language" open - you'll be able to read useful hints about switching layouts using keyboard accelerators, having a layout per window or one for all windows, and more.
GNOME Volume Control
You may find that although you can set sound levels using the 'speaker icon' menu in the GNOME top bar, these settings are lost on a reboot (and sound is muted each time). If this occurs on your system (it affects the CF-AX3), take the following steps. First, emerge media-sound/alsa-utils (you can do this via the ssh/screen terminal on the helper PC):
(1) koneko ~ #emerge --ask --verbose media-sound/alsa-utils
... additional output suppressed ...
Would you like to merge these packages? [Yes/No] <press y, then press Enter>
... additional output suppressed ...
Once that completes, set the volume levels as you like them, then issue:
(1) koneko ~ #alsactl store
The settings should now be preserved across a reboot.
You may also need to change your output settings in the GNOME 'Sound' control panel to hear anything: on the CF-AX3, you need to choose the 'Analog Output' option, which is not selected by default.
Turning tracker Fully Off
Next, if you wish to ensure that GNOME's tracker software is disabled completely for your current user (this step is optional), click on Windows Key, then type "search" (and press Enter; you may need to press twice). Then ensure the slider on the top bar of the shown dialog is turned off.
Instead of turning tracker off entirely, you can fine-tune the and apps that it queries using this dialog (and, via the 'cogwheel' icon, which file locations it indexes).
Close out the dialog window when done.
Restarting into GNOME!
We are now ready to bid farewell to the services of the helper PC, as all further steps can now be done on the target machine directly. Close out the ssh/screen terminal. Issue:
(1) koneko ~ #exit
which will close the first screen terminal, then:
(2) koneko ~ #exit
to close the second one, then:
koneko ~ #exit
which will close out the ssh session itself.
If installing over WiFi, it is possible that your ssh session may have hung when you temporarily lost connectivity due to starting NetworkManager above, making it impossible to enter the above exit commands. If this has happened to you, simply press Enter followed by ~ then . (tilde then period) to terminate it,[19] or alternatively close its surrounding terminal window on the helper PC.
Now, ensure that the USB boot key is inserted in the target PC, and reboot it, by clicking on GNOME's 'power' icon (in the top right of the screen), clicking on the 'power' button in the dropdown menu that then appears, and then clicking on the 'Restart' button in the dialog.
The machine should then power cycle (you will be cleanly logged out of GNOME first). When the machine restarts, as before, you will need to enter your LUKS keyfile gpg passphrase (the one you created earlier), directly at the target machine keyboard to unlock the LUKS partition. You should then be presented directly with a GNOME login page (as above). Directly at the target machine, click on your (regular) user name then, when prompted, type in the (regular user) password you set up earlier (ensure you have the correct keyboard settings, if relevant, as discussed above). GNOME should remember the session type you selected last time (e.g., GNOME), and default to using that.
Once logged in to GNOME, bring up a web browser: directly at the target machine's keyboard, press the Windows Key and type 'Web', then press Enter to start the first item shown. GNOME's default web browser will start up, (if it initially opens full-screen, you can drag it down by the top bar to make it a normal-sized window). You can then type in the URL for this tutorial (User:Sakaki/Sakaki's EFI Install Guide/Setting up the GNOME 3 Desktop#rejoin), so that you can continue to follow it there.
From this point on, all interaction with the target machine will be done directly (and not via the helper PC), unless otherwise noted.
Now that NetworkManager is running, even if you have been installing over WiFi, and had to manually restart wpa_supplicant in the previous two chapters, there should be no further need to do so. WiFi network access should now come online automatically after boot.
Now, bring up a terminal window in GNOME. Press the Windows Key again, and type 'terminal', then press Enter. A standard-issue terminal window should open. As we have some final installation work to do, become root:
sakaki@koneko ~ $su --login root
Password: <enter root password>
The password required here is the one you set up earlier in the tutorial (and have used when ssh-ing in).
Next Steps
Congratulations - if you have followed through to this stage, you have a basically functioning system! There is some final driver configuration left still to do, so let's address that now. Click here to go to the next chapter, "Final Configuration Steps".
Notes
- ↑ [https://wiki.gnome.org/Projects/GnomeShell/CheatSheet GNOME Shell Cheat Sheet"
- ↑ Høgsberg, K. "Wayland FAQ"
- ↑ Securing Debian Manual: Chapter 12: "Operating system users and groups"
- ↑ Ubuntu Wiki: "Privileges"
- ↑ Debian GNU/Linux Desktop Survival Guide: "Standard Groups"
- ↑ ArchLinux Wiki: "Bluetooth: Installation"
- ↑ ArchLinux Wiki: "Users and groups: Group list: Pre-systemd groups"
- ↑ Wikibooks: Guide to X11
- ↑ Red Hat Bugzilla: "EFI install in VirtualBox results in text install "
- ↑ Kroah-Hartman, Greg. Linux Kernel in a Nutshell (ebook). O'Reilly, 2006
- ↑ Dubbs, Bruce. "Considerations when configuring the Linux kernel". 28 May 2009, Linux from Scratch.
- ↑ SuperUser Forum: "Obtain Kernel Config from Currently Running Linux System?"
- ↑ Xorg Foundation Miscellaneous FAQ. "How do I set the correct permissions of my Xserver binary?"
- ↑ Anne, Surendra. "What is SUID and how to set SUID in Linux/Unix?"
- ↑ Yao, M. "Go Away, tracker-store"
- ↑ Fedora Project Forum: "How Do I Disable Tracker in GNOME?"
- ↑ Gentoo Wiki: "NetworkManager": Configuration
- ↑ Arch Linux Forum: "GNOME 3.24 Always Loads X11 instead of Wayland"
- ↑ Plankers, Bob. "SSH Escape Sequences (aka Kill Dead SSH Sessions)"
| < Previous | Home | Next > |

